What We Do

Showing posts with label Crafty. Show all posts

Tuesday, May 25, 2010

Decorating with Fabric

I have this hanging in my house. Cute, huh? It was super easy!

I bought the small picture frames at IKEA, they were like $3 for 2 of them. I bought 4 packages (8 frames). They come white, I just spray painted them black. I purchased the large already black frames, with the mat in them at Walmart for $5 each. I found fabric that I liked and matched the colors and style I was going for in my front room in the scrap fabric at Walmart together the pieces of fabric cost less than a dollar. I took the fake little picture that comes in all frames and traced around it on to a piece of thin card board (I just used a cereal box). Then I took the card board and cut the fabric about an inch bigger around all the sides, pulled it around the back of the cardboard and hot glued it down. Put your new “picture” back in the frame and your done!

Photobucket

Monday, May 24, 2010

Cart Coupon Carrier

Last week when we were at the coupon conference, Melea told us how she just sticks the coupons that she is going to use in her pocket and then unloads her pockets at the register. But sometimes she doesn’t quite get them all out, and by the time she finds the forgotten coupons it’s not worth driving back to the store and unpacking her baby again to go back in and deal with it. I had seen a few things floating about the internet, but I didn’t really like any of them, I didn’t think they were very practical or useful for me. So I came up with me own version, and here I am sharing it with you! We are also considering selling these… what do you think? Would you buy one?


1- You need a piece of patterned fabric 6 in. x 17 ½ in. and a piece of see-though fabric that is 6 in x 5 in.(You could use plastic if you want, but I was afraid it would rip to easy after sewing it) If you don’t have scrap fabric laying around, and you need to go to the store to yours most places won’t let you buy a piece of fabric that little, I would say buy about a foot of fabric for the patterned and if they will let you buy about 8 in of the see-though stuff. This will be good for 2 reasons 1) you will have extra in case you mess up, and 2) the nice lady that cuts your fabric will probably not cut it straight, but you will be able to fix it at home!


2- I put the Velcro on next, I used Velcro dots, for a set of 18 it was $2.50 at Walmart. But really the shape of the Velcro so does not matter. On the top and bottom sew the Velcro on to the face up side. You’re going to want to make sure that they will line up straight before you sew them down, mine had sticky on the back so I was able to place them and make sure it was right before I sewed, but a pin will work just as well.


3- Fold the top over about a ½ in (just bigger than the size of your Velcro) and sew it down. Then fold the bottom up accordion style so the Velcro ends up on top. Now fold the bottom up about 4 ½ in. and sew it in place.


4- Take your see though fabric and cut the side that you want to be the top straight, fold it over a couple times and sew it, this will finish off the edge. Then add a piece of ribbon to it. I forgot to take a picture of this, but you can see it in the next picture.

5- Then take your see though fabric and place it in top of the other fabric, cut around the edges so that they all match up (you may even want to leave a little extra to be trimmed off after you sew it down, the edges of this fabric fray VERY easily.) and then sew around the 3 edges, get as close to the side as you can.


6- Now measure and cut some ribbons that will the edges of your bag. I cut mine about an inch longer than I needed. Iron them so that you have a nice seam down the middle.


7- Take the ribbon and pin it down around the edges to that it wraps around the back (this is going to hide all the unfinished sides). And… you guessed it… sew it down. You will want to go slow that you make sure your ribbon doesn’t slide off and you miss sewing it to the fabric! I only put ribbon around 3 sides, because when it’s hanging on your shopping cart you won’t see the top. When you are done cut off the extra ribbon and put some clear nail polish on it so it doesn’t fray (there is probably a better way to finish off the edge of ribbon… but I am unaware of it).

8- You’re DONE! Fold the top over and admire that you just made! Now when you are at the store you have some place easy to store your coupons and you won’t miss any cause you see if there is anything left in the bag!


Photobucket

Wednesday, April 28, 2010

Baby Name Wall Art

I made this for my cousin as a baby shower gift. It took a little bit for time, and not a whole lot of money. I spent about $20 at Roberts Craft to get all of the supplies, but I have leftovers of everything. (I did find out afterwards that the paint I got for $2 on sale, was regularly only $1 at Wal-Mart)

I found out what colors she was doing her nursery in, and double (and triple) checked with her on the spelling she was using for her babies name.

1- Lightly sand everything. The wooden letters that I got just had a couple rough edges and I just wanted to smooth it all out before I painted.
2- Paint everything. I painted the dowel and all of the letters (front and back) white. It took about 30 minutes for everything to dry and then I painted everything a second time.
3- Once the second coat of paint was dry I started deciding how I wanted everything to look. At first I just laid out all the letters and started placing things on them without gluing anything down. All of the ribbons are just wrapped around the back and glued down. I didn’t want to worry about cutting them the right length. The flowers on the “O”, “I” and “E” are just paper scrapbooking flower. The little buttons and the “O”, both “A’s”, the “I” and both “E’s” are actually brads, but on the “E” and both “A’s” I bent the metal pieces back and forth until they broke off. For the “K” I took a piece of ribbon about 3 inches long and folded it over and the little buttons on top of it were buttons I had left over from something else (I don’t even know what) and they are just glued down. To paint the strips on the “L” I used painters tape to make the lines (there was no way I could have free handed that!). On the “E” I actually hand sewed the brads to the ribbon so that they looked like real buttons. The flower on the “M” I made out of ribbon and to hold it together I sewed the button to it. And on the last “A” I tied the ribbon around the small part, tied a lose knot so that it could be smashed down with then I glued the brad to it, and then I just left the ends long and glued them to the back.
4- After I had decided on how I wanted it to look I started gluing. YIKES! I hate that part… it’s so final and I don’t want to mess it up! I just used hot glue for everything.
5- Once the letters were all decorated and glued. I placed the ribbon on the letters. I did the ribbon at different lengths so that it wouldn’t hang straight.
6- After I had all of the letters on the dowel, I glued the bows on the ends. I made the bows out of wired ribbon. I then did a little touch up paint. I found that nails were leaving little black marks on the dowel, so using thumb tacks worked much better. (And they are so much more user friendly than nails!)

I was very proud of it all turned out. It did take a little bit of time, but I just worked on the about an hour a night for about 3 nights. My cousin also said that she loved it, so all of my hard work was appreciated! I haven’t seen it in the nursery yet, but I will try to get a picture of it when I do. Little Oaklie isn’t here yet, she is due to arrive in about a month, so I will let you know what she says about it when she sees it too!


Photobucket
Posted by Picasa

Saturday, April 24, 2010

Grocery Bag Storage

Does your pantry tend to look like this?

Or do you have a hidden drawer kind of like this?


It’s okay to admit it, we do too ;). We re-use our plastic bags for lunches, trash can liners or returning the clothing our nieces and nephews leave at our houses (they never go home naked… why do we have half of their wardrobe?). But we never had a fun, cute and sassy way of storing them in our home. So here is our solution!

My Mom had one of these handy little grocery bag holders hanging in our pantry growing up. But we had yet to see one that we could buy, and we knew full well we could just make it! Here’s how:

1. Cut your strips of fabric into 8 pieces 4in, x 18 in. each. I used 4 different fabrics, 2 strips each. If you want to just use one piece of fabric cut it 28 in x 18 in. (If you do it with one piece of fabric skip to Step 4)

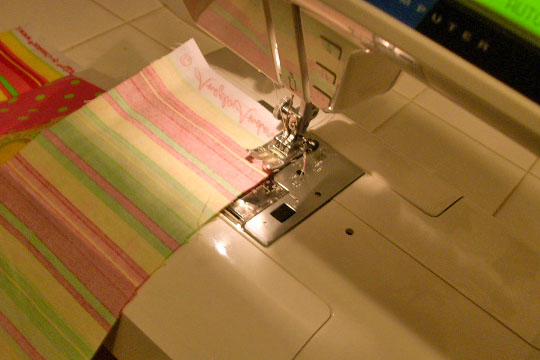
2. Start sewing your pieces together with the right sides together. I left about 1/4 in. seam allowance.

Make sure that you keep one edge lined up straight. I used the factory edge of my fabric and always start your sewing from your straight edge. The other side will probably not line up straight, it’s ok, we will fix it!

3. Sew a button hole on the side that you want to be the top. Put the button hole 1 ¼ in. to 1 ½ in. down from the top in the middle. Most sewing machines will sew the hole for you and then you just make a little snip in the fabric and you’re done! It’s really easy! Don’t be scared to really use your sewing machine. I practiced on some left over fabric before I did the real one. I'd never done it before either.

4. Fold the whole thing over the long way putting the right sides together and line up your straight edge with the shortest strip on the other side, then cut off everything that hangs over. Then, sew up the side. I did the same ¼ in. seam allowance.

5. Leaving the bag inside out fold over the top and the bottom an inch. I used ½ in. ribbon on mine.Iif you are going to use ribbon bigger or smaller just fold it over so it’s a ½ in. bigger than your ribbon. On the top sew all the way around, but you will need to leave about a 1 in. space open on the bottom to thread your ribbon through.

6. Now we are going to put the ribbon on! Take the end of your ribbon (don’t cut it off yet) and but a safety pin on it, or use a bobby pin and tie the ribbon to it. Then just slide it in the button hole and start fishing it through, When you get it out the other side pull it so there is about 10-12 in. on each side and the whole is not too bunched (you need to be able to stuff the bags inside it.). Tie a cut bow, and your just about done! Do the same thing with the ribbon around the bottom, here you do want the hole to be kinda small and bunched (so the bags don’t fall out, but you can easily pull them out).TTie a knot in the ribbon and let the rest hang.

7. Then take about 6in of ribbon fold it over like in the picture, and sew it to the bag. Cut off the lose threads and DONE!

We hope that you love yours as much as we love ours!

No more crazy drawers or scary pantries!
Photobucket